Using Page Actions to Test Interactive Content (Part 1 of 2)

I’m happy to announce yet another new video to our collection of video tutorials covering the features of WebsiteUpgradeTester.com, our new cloud-based, visual testing tool designed specifically to help you test your website upgrades.
In this two-part video, we are going to cover the power feature of Page Actions and Action Sets, to expose and test interactive content within your site.
Video Transcript (Part 1 of 2)
Welcome to Website Upgrade Tester.com, the new cloud-based tool helps you test any upgrade, service pack or security patch to your website.
This is the first part of a two-part video about Page Actions.
In this video, I’m going to walk you through using Page Actions to expose interactive content that you wish to test. In the second part, we’ll use Page Actions to mitigate dynamic, interactive or randomized content.
What are Page Actions?
Well first, what are Page Actions?
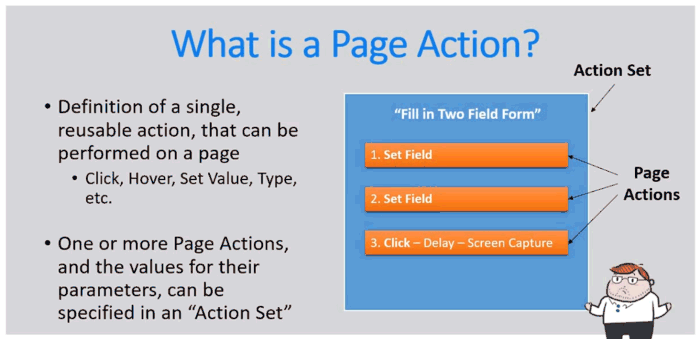
A Page Action is the definition of a single, reusable action, that can be performed on a page, such as Click, Hover, Type, or Set Field Value.
Each Page Action has its own set of parameters that control its action.
One or more Page Actions and the values for their parameters can be specified in an “Action Set”. For example, if you wanted to simulate filling in a form with two fields, your Action Set might contain two “Set Field” actions and a “Click“ action to submit the form.
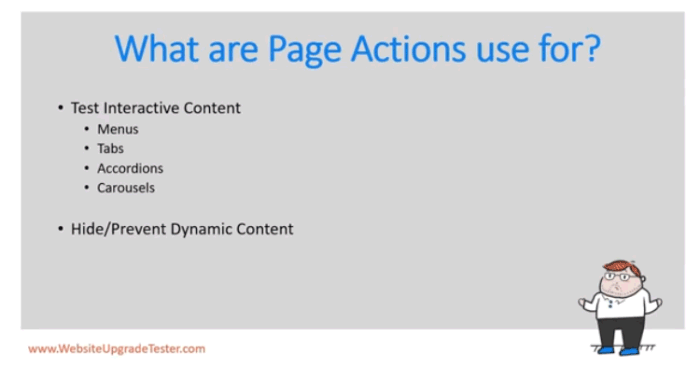
Page Actions can be used in any way you wish to control the page. For example, you can use them to open up one or more menus, activate one or more tabs or accordion panels, cycle through a carousel, or to hide pieces of dynamic content.
A set of Page Actions can be saved specifically to a page, or saved globally in a named Action Set.
An Action Set can then be applied to a specific Page, a set of Pages or All Pages.

Let’s see how to create and manage these Page Actions and then roll these up into an Action Set.
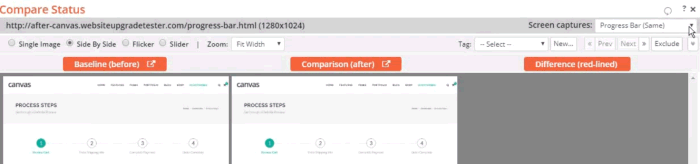
In our first example, let’s look at one of the pages in our Canvas demo site.
Here you can see that this page demonstrates a shopping cart progress bar. As the user clicks each step, the content underneath it changes.
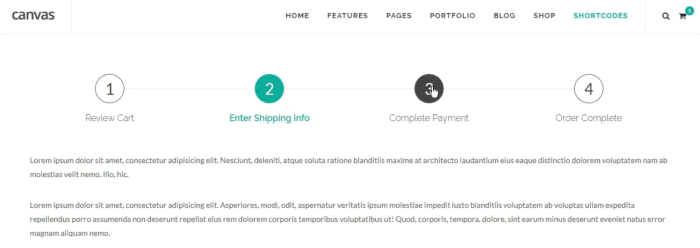
If we were to just take a single snapshot of the page as it looks without any user action we would miss testing some of the page’s content that is initially hidden.
Let’s see how we can test all of it.
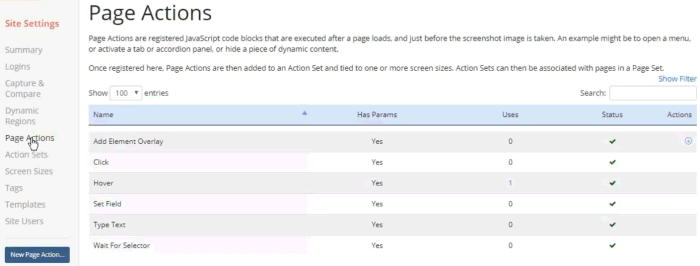
If you click the Site Settings gear icon on the left side menu, you will see two menu items: Page Actions and Action Sets.
By clicking the Page Actions menu you will see the actions that come out-of-the-box ready for your use. You can also create your own, but you probably won’t need to.
If I click the Action Sets menu, you will see that only one Action Sets is provided by default. We’ll come back to that later, but for now, let’s create one by clicking the blue ‘New Action Set’ button.
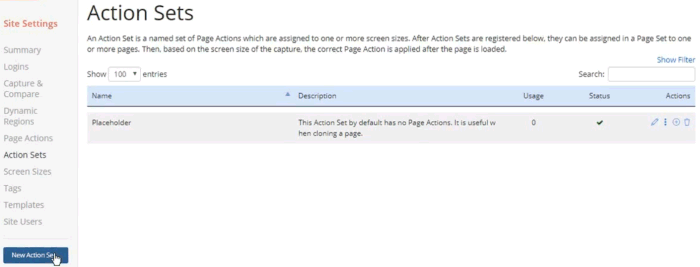
I first give the Action Set a name, in this case, “Progress Bar”, and an optional description. If I want this action to be applied to All pages I can check the ‘Apply to All pages’ checkbox.
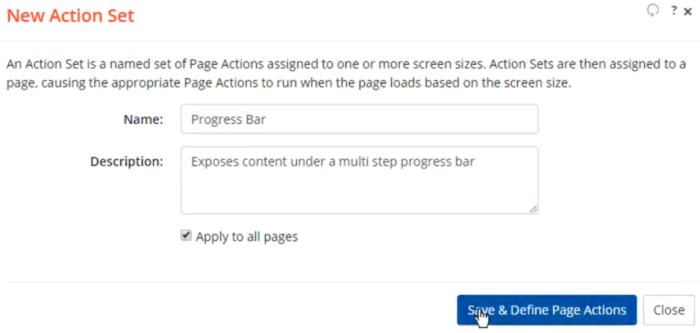
Next, I click “Save and Define Page Actions”, where I will see an empty table to start.
Here I can add one or more Page Actions to the Action Set, and order them by dragging and dropping.
In our case we need to simulate clicking on each of the progress steps, so I’ll click the ‘Add Page Action’ button and will choose the out-of-the-box ‘Click’ action.
After I choose the action, additional fields specific for that Action will be displayed. Simply fill them out as required.
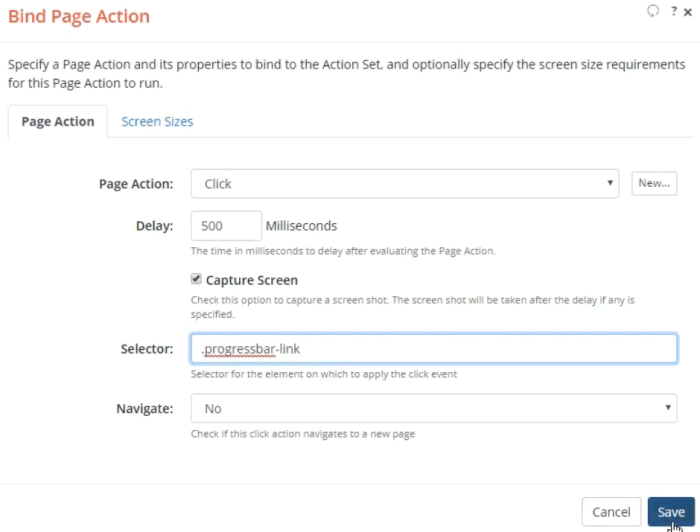
Each Page Action allows me to specify whether a delay is required after the action, and whether to take a screenshot.
Here I’m going to specify that we delay 500 milliseconds, or half a second, after the click. That way I’ll allow the content to fully render after the Progress Step is clicked.
I also want to take a snapshot after each click, and delay, so I’ll check that option too.
The “Click” Page Action requires me to provide a CSS selector of the element I want to click.
Here I have two choices. If I specify a selector that resolves to a single element, such as an ID, the tool will only click that one link and take a snapshot.

But if I specify a selector that matches more than one element, like a class which targets each link in the progress bar, the tool will click, delay and then take a screenshot for each link. This way it is possible to have multiple screenshots per page, capturing all of the content.

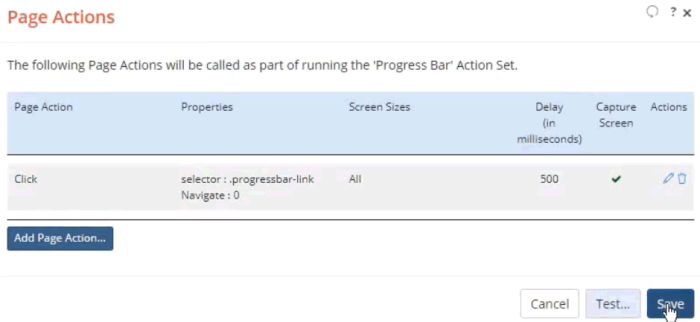
If I click Save, the Page Action is added to the Action Set table.
Here I only need 1 action, but I could have added multiple ones to this Action Set. If there were multiple, the Page Actions would be run in the order in which they are specified -- from top to bottom.
Any Page Actions that check the option to take a screen capture, will cause one or more screenshots to be taken for this page. If none of the Page Actions have the option checked, a single screenshot will be taken at the end, after applying all Page Actions.
OK, let’s save our new Action Set and go re-run that example page. Because I chose “Apply to all Pages”, this action will run on all pages. If any of them have a Progress Bar, each of the links will be clicked.
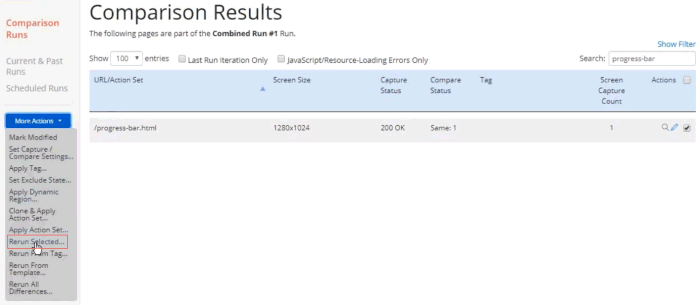
To rerun the page, I’ll click the Comparison Runs icon, and drill into the last run.
To find the page quickly I’ll use the search and type in its name, “Process bar”.
There we go.
So here I can see that there was only 1 screenshot capture during the last run.
Let’s select this page and click the More Actions button and choose the Re-Run Selected option to kick off a rerun.
I’ll choose to re-run both the baseline & comparison captures and the image comparison.
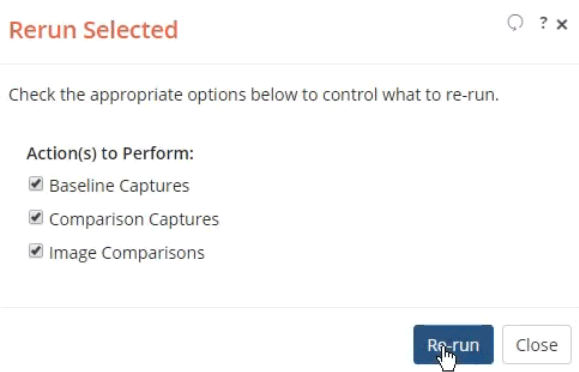
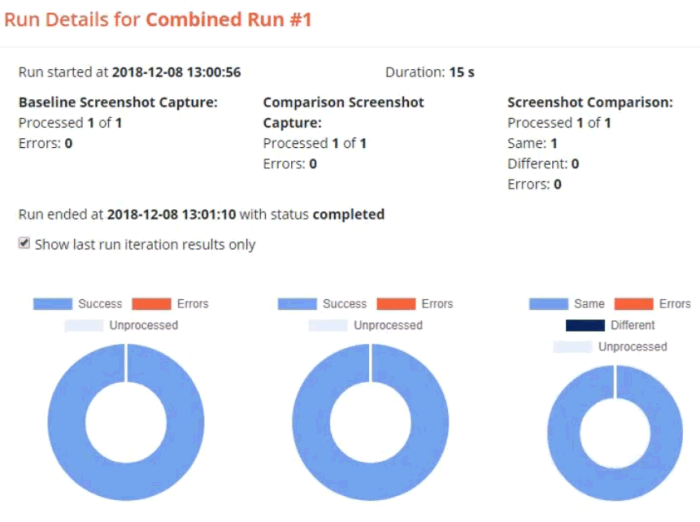
This will take a few seconds to run.
Ok, it’s done. I’ll check the Last Run iteration checkbox so only these results will be shown.
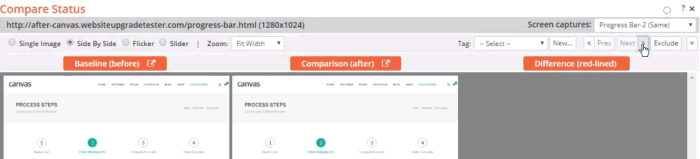
There we go, now you can see there are 4 screen captures for this page. If I click the magnifying glass I will be able to navigate through each of the pages.
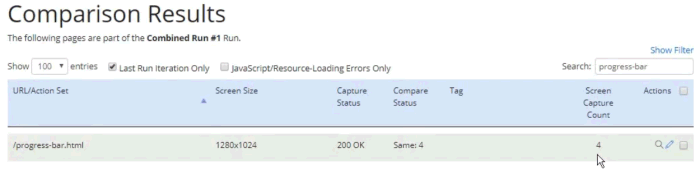
Here you can see the results of clicking the first link in the Progress Bar, next the second link. Now the 3rd and the 4th.
There you go. We have now captured interactive content.
In the previous example, we showed saving a Global Action Set that was applied to all pages.
Now let’s create one that is specific to a page.
In our Canvas demo site, all the pages have a mega menu that is opened when the user hovers over the main menu. Because the menus are exactly the same on all pages, I just need to test them on one page.
Let’s do that now.
Here I’ll use an events page to perform our test.
I’ll open the live page, and as you can see, hovering over each menu, opens it. Some are small menus with submenus and others are mega-menus.
Let’s close that window, and we are back on the Run Results page.
In order to create the page specific Action Set, I’ll need to edit the page properties. But before I do that, let me tell you about one feature of the tool.
If you have a page that has multiple different interactive elements on it, you don’t have to create one big Action Set that tests everything. You can create separate Action sets for each type of element. For example, one for the menus, and one for a carousel or tabs.
To do this, you need to have the same page appear in your results multiple times, but with a different Action Set.
You do this by selecting the page, and choosing the “Clone and Apply Action Set” menu item from the More Actions menu. Here we will choose the out-of-the-box “Placeholder” Action Set, that does nothing.
Ok great, now we see the same page listed twice. One with no Action Set, and One with the placeholder Action Set.
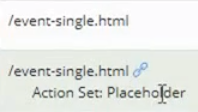
Let’s edit the placeholder version.
When I click the “Action Set” tab, it reveals a selection list showing that my current Action Set is the ‘Placeholder’ one. Instead of using this global one, let’s switch the setting to “Page Specific”.
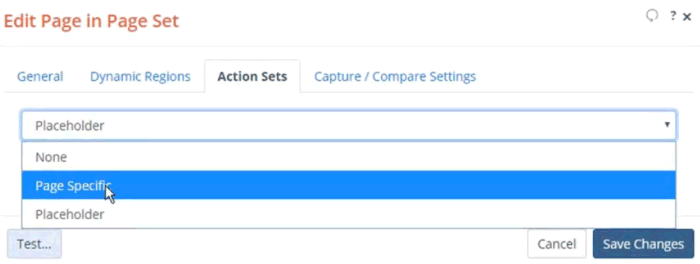
It’s worth noting that our “Progress Bar” Action Set is not listed because it is already Applied to All Pages.
Once I choose Page Specific, I need to give it a name, and then I see the same interface for adding Page Actions to this page specific Action Set as I did before.
For this example, I’ll just test two of the menus: The “Features” and “Pages” menus.
Ok, same steps as before. I’ll click the blue “Add New Page Action” button, then choose the out-of-the-box “Hover” Page Action, set a short delay, <pause> check the screen capture option, and will specify the “Feature” link’s DOM ID.
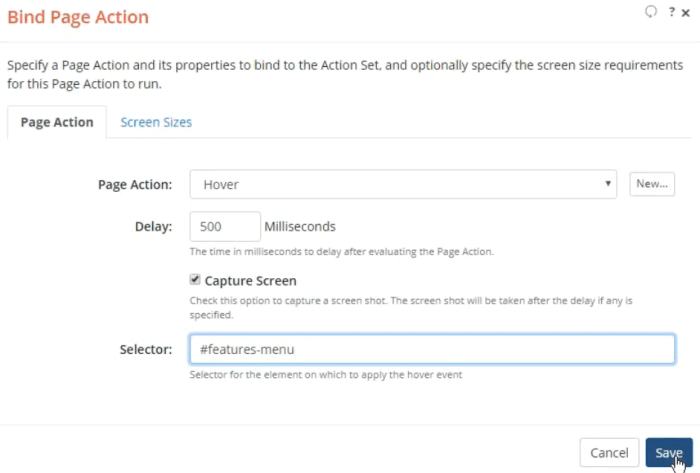
Ok, let’s save that one.
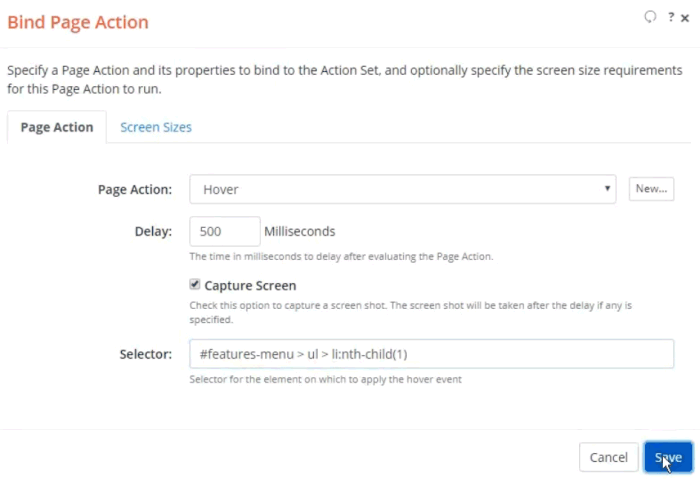
The Features Menu has submenus that also activate on hover. Let’s test just the first one.
Again, it’s a similar process so I’ll speed through this.
There we go.
And lastly, we’ll open the “Pages” mega-menu.
Ok, we’re done with that one, too.
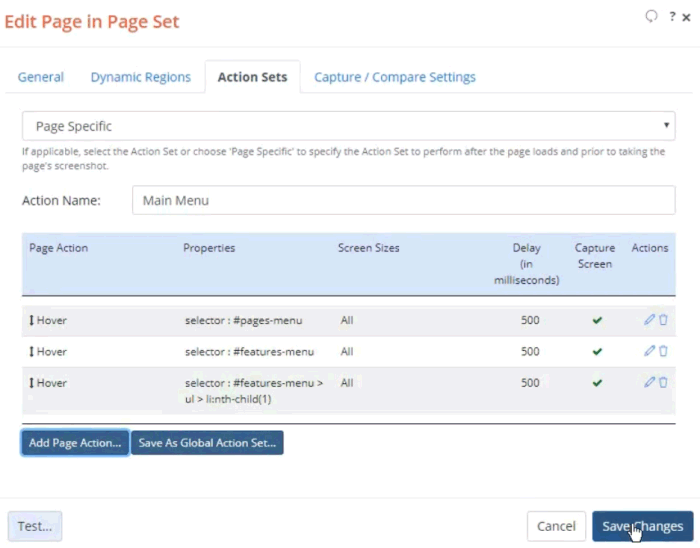
Now you can see that I have 3 Page Actions in my page-specific Action Set. Not that it really matters in this example, but I’ll drag the Page menu above the Features menu so that its Action occurs first.
Ok. Let’s rerun the page, just like we did before.
Back on the Runs Listing Page, Notice that the Screen Capture Count is currently 1. After I re-run it, it should be 3, one for each of the two top-level menus and one for the submenu.
Here we go. Rerunning this page should be pretty quick.
Ok, it’s done and we do have the 3 screenshots as expected.
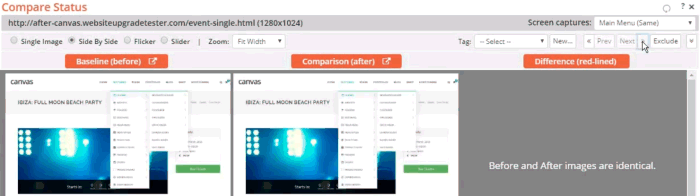
If I open those you can see each of the menus.
The Pages menu appears first.

Then when I click next - the Features menu.
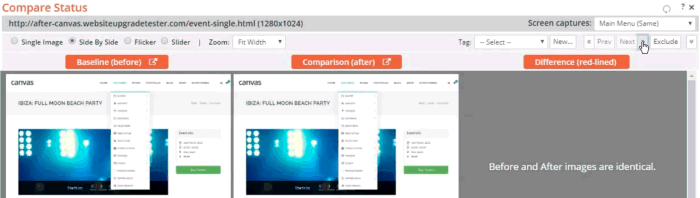
\And again - the submenu.
So there you have it. You now know how to create Page Actions and Action Set’s to test interactive content.
If you are a developer, be sure to check out part 2 of this video, where we will create our own javascript based Page Action, and apply it to mitigate dynamic content.
---
WebsiteUpgradeTester.com is the only cloud-based, automated visual testing tool designed to help you efficiently and affordably test your website upgrade. Whether it’s a major version upgrade, service pack or security patch, you can quickly test your entire site, no matter how large, to uncover any lurking issues due to the upgrade.
Don't waste time manually testing your next Website upgrade. Visit WebsiteUpgradeTester.com and sign up for a free trial.
For more detailed information about best practices on upgrading your website and improving your website maintenance processes, we recommend reading The Ultimate Guide to Upgrading and Patching Your Website.
Featured Blog Posts

The Ultimate Guide to Upgrading and Patching Your Website
In this Ultimate Guide to Upgrading and Patching Your Website, we’ll walk you through all of the terms, concepts, ideas, and best practices around upgrading a medium to large scale website. We’ll impart our experiences of helping customers perform and test their website upgrades over the past 20 years, so that you can upgrade faster, more efficiently, more often and with better results. Read More


CASE STUDY: How Global Manufacturer ESAB Saved Time, $ and Headaches with their Website Upgrade
ESAB leveraged a new cloud-based visual testing tool designed specifically for website upgrades to automate and streamline their testing efforts. Using the tool saved an estimated three weeks of manual testing time, increased accuracy significantly, and gave the team peace of mind that there were no lurking surprises. Read More