Using Page Actions to Test Interactive Content (Part 2 of 2)

This is part 2 of the 2 part video about how to use Page Actions and Actions Sets to expose and test interactive content.
Video Transcript (Part 2 of 2)
Welcome to Website Upgrade Tester.com, the new cloud-based tool that helps you test any upgrade, service pack or security patch to your website.
This is the second part of a two-part video about Page Actions.
In part 1 of this video, I walked you through using Page Actions to test interactive content such as menus, tabs, accordions, and carousels. In this video, I'm going to cover creating your own JavaScript based Page Actions to mitigate dynamic or randomized content and how to also use them to tag your content.
As you learned in the first video, a Page Action is the definition of a single, reusable action, that can be performed on a page.
The tool provides several out-of-the-box Actions such as Click, Hover, Set Field, etc. But you can also create your own, and that's what we'll do now.
Let's set the stage with an example. Here, this page is a sample 404, File Not Found page from our Canvas demo site.

It auto plays a video on page load that covers most of the page's real estate. Because the video doesn't start playing exactly at the same time, it causes minor differences to be seen when comparing the before and after screen captures for the page, even though the content is exactly the same.
I can see these differences if I look at the Compare Status results for this page.
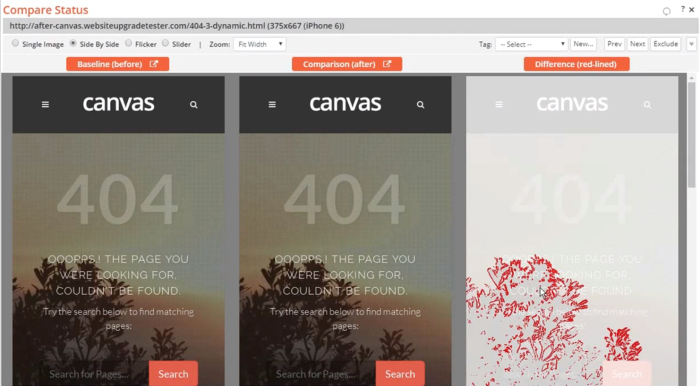
The red-line version has highlighted the pixel changes due to the video motion, and if I switch to flicker mode I can see that motion as the grass blows in the wind.
To mitigate out this content I could remove the entire video using a Dynamic Region, but this would leave no content on the page to test. Instead, if I could just stop the video from auto-playing on load and I would be all set.
Let's do that now.
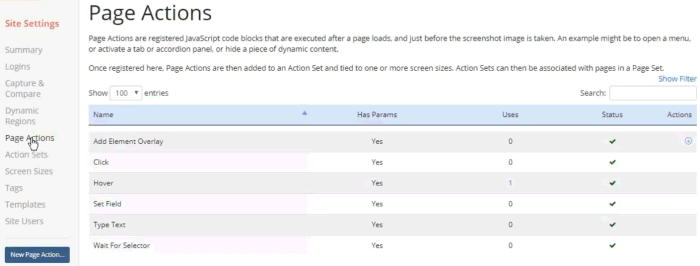
I'll click the gear icon to open the Site Settings Summary page, then I'll click the Page Actions menu.
We'll be creating a new Page Action so I'll click the blue 'New Page Action' button, which will open a dialog with two Tabs.
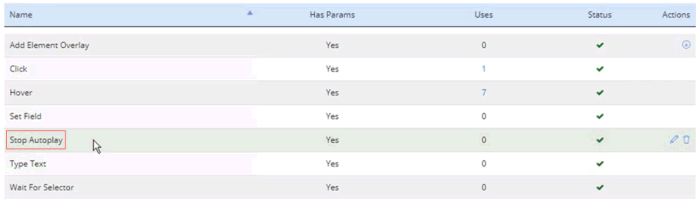
To start, I'll give the Page Action a name. In this case 'Stop Autoplay'.
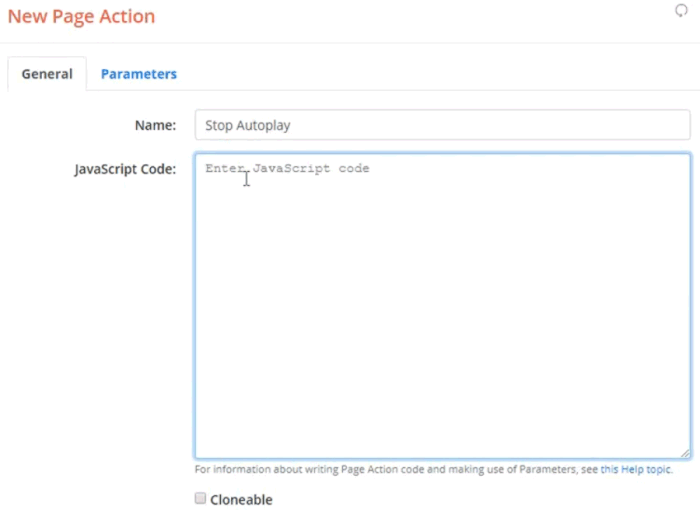
The next field is where we'll provide the JavaScript code that will be executed prior to taking the page's screen capture. This code is what will stop the video from auto-playing. I'll come back to it in a second.
In order to make our Page Action a little more generic, I'll code it so that it can take parameters that can be tailored for different uses.
To do that I'll click on the Parameters Tab,

and then on the 'New Parameters' button to specify the details of our first parameter.
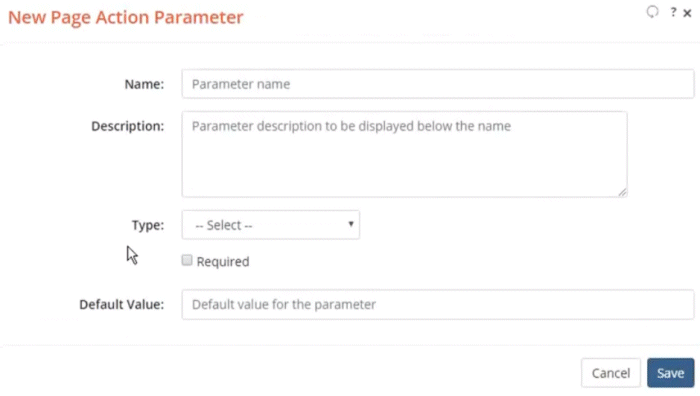
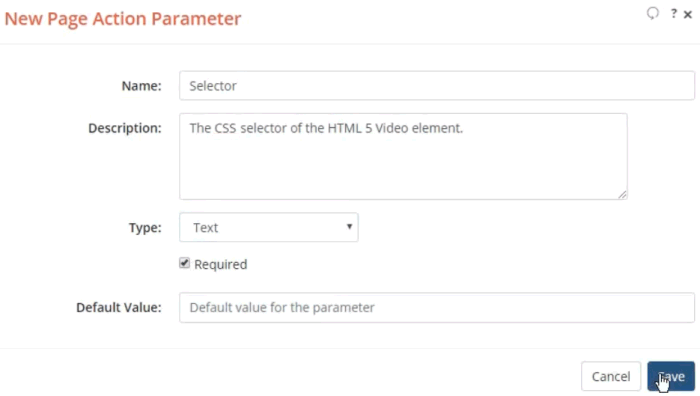
In our case let's prompt for the CSS selector that identifies the video on the page. I'll name the parameter 'Selector' and will give it a description.
Next, I'll choose from one of the following field types, that will control how the parameter values are specified. In our case, I'll just use an input field, as I want them to type in the CSS selector name.
Ok, next I'll mark this parameter as being required so that it must be specified, and won't give it a default value.
That looks good. Let's save this parameter.
Ok great. I can see it in the Page Action table.
Let's add one more just for fun.
Not that it is needed, but for this demo, let's draw a border around the entire video, just so that it is more visible than the Page Action actually ran.
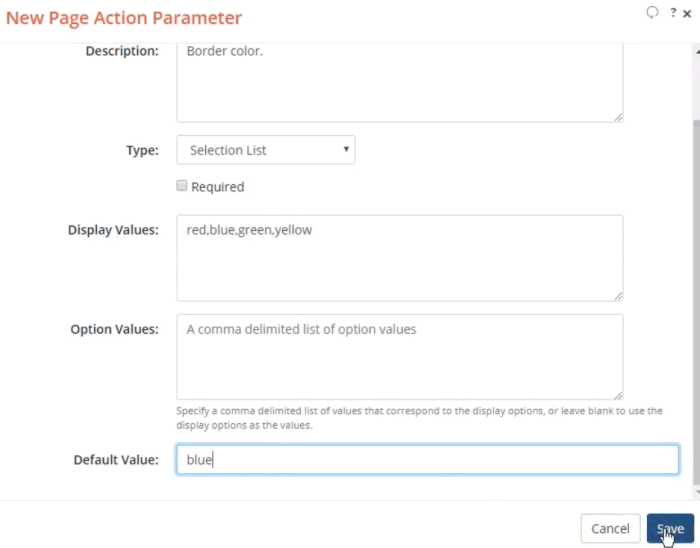
I'll create a second parameter specifying the color of that border.
Ok, I'll name the parameter 'Color',
give it a description, and in this case, I'll choose a selection list as the field type.
Next, I'll simply specify the colors I want to appear in that list.
Red, Green, Blue, Yellow.

I don't need separate option values, for each item in the list, so I'll leave this field empty.
And let's specify Blue as our default.
Ok, we'll save it.
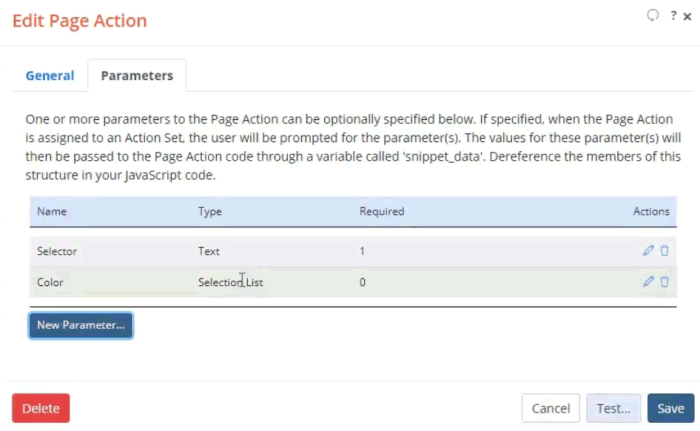
Now we have our two parameters for this Page Action.
Let's pop back over to the first tab and write our code.
First, we want to pause the video, just in case it has started playing.
In this case, our demo site uses jQuery, so I can use jQuery to perform my Page Actions. Remember that this code will be executed within the context of your page.
So to reference the video object I'll use the selector parameter. The website Upgrade Tester Tool will set up a variable named 'snippet underscore data' which is a javascript object with keys for each of the parameters. The keys are always forced to all lower case.
Something like this.
Then in order to call the Pause method on the video element, I'll need to reference the actual DOM object like this.
Next, I'll rewind the video to the start.
And then draw our border using the color parameter.
I'll make it 3 pixels wide.
There we go.
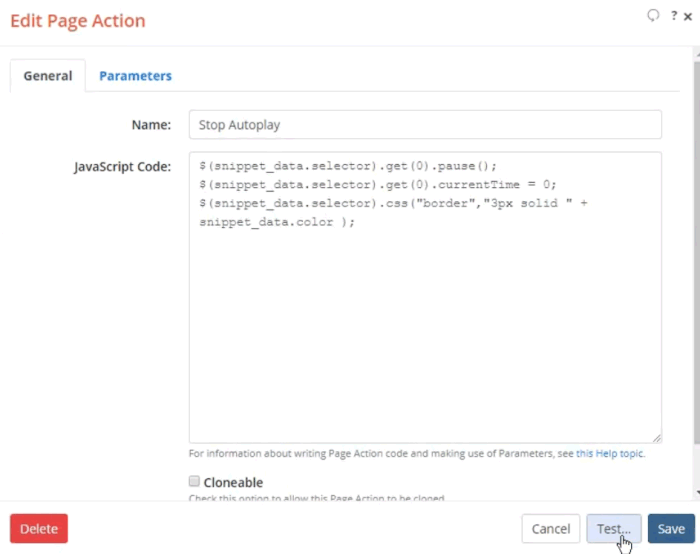
Ok, that looks good. Let's test it now by clicking the Test button.
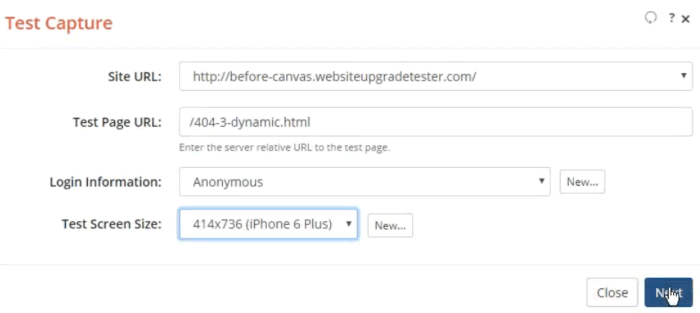
This opens a dialog where I'll need to specify which site I want to run the test on, either the pre-upgrade or post-upgrade version of my site. And the server relative URL to the page I want to test.
In this case the example 404 page.
I don't need to log in so I'll leave this as Anonymous.
And lastly, I'll choose a screen size to test against.
Ok.
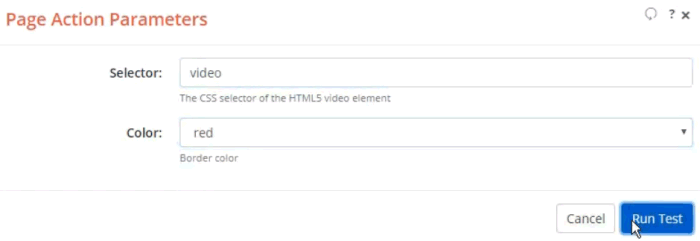
Since my Page Action has parameters, I'm prompted to fill them in, so I'll do so now.
For my selector, I'll just use the video tag, so 'Video', and I'll pick the color Red.
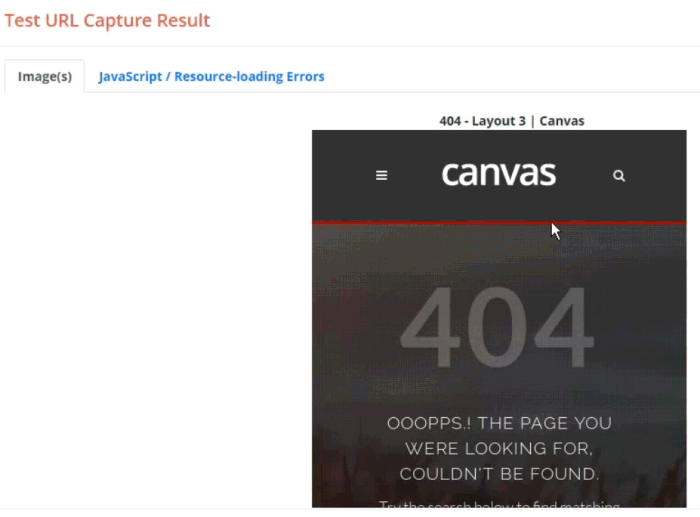
This will only take a few seconds and I should see the results.
There we go. It looks like it is at the start of the video and I can see the border is Red.
Great, it worked. I'll Save it. And now you can see it in the Page Actions list.
Next, in order to apply this to all pages, I'll create an Action Set and specify the Page Action we just created.
To do this I simply click the Action Sets menu option and then click the 'New Action Set' button.
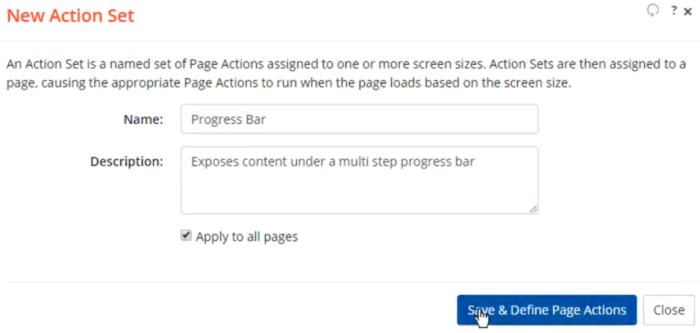
In the resulting dialog, I'll give it a name and description.
I'll click the 'Apply to All Pages' checkbox and then will click the 'Save & Define Actions' button.
Here, I'll need to define one or more Page Actions that will make up this Action Set. In our case, I only need one action, which I'll create now.
I'll click the 'Add Page Action' button and then will specify our 'Stop Autoplay' action.
Let's give it 300 milliseconds of delay or roughly a third of a second.
We don't need to take a screen capture here, because one will automatically be taken at the end after all Pages Actions and Dynamic Regions execute.
Next, you can see our two parameters. I'll use the same selector, but this time I'll choose Yellow.
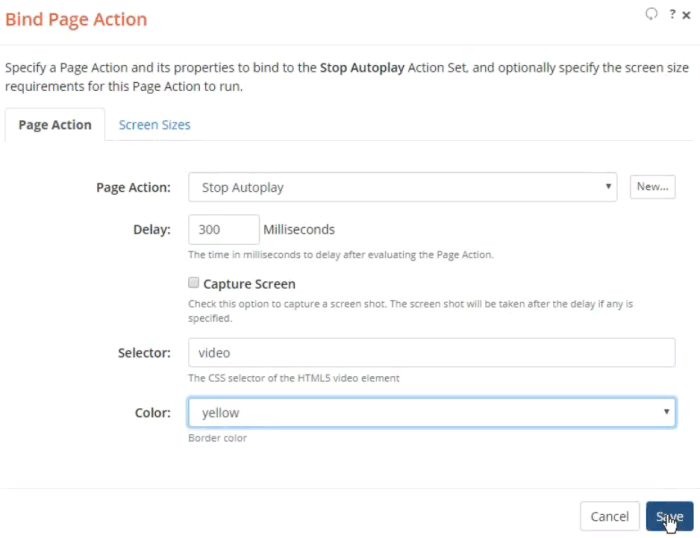
Ok. Let's Save it.
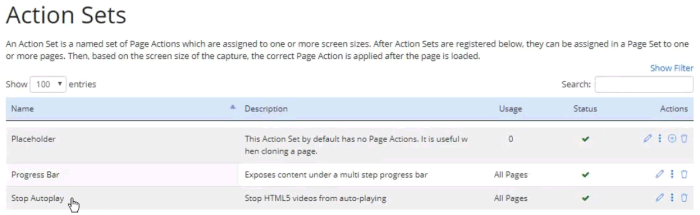
Yep, I now see it in the Action Set list and it is set to be run on all pages.
Next, let's see if this Action Set corrects the differences we saw when the comparison ran against the before and after versions of the page.
I'll navigate to the Comparison Runs page, Click to see the Differences and will filter on the 404 Page title.
There we go. I can see the three screen size captures for our page.
I'll Select All, and will choose the 'Rerun Selected' option from the More Options menu.
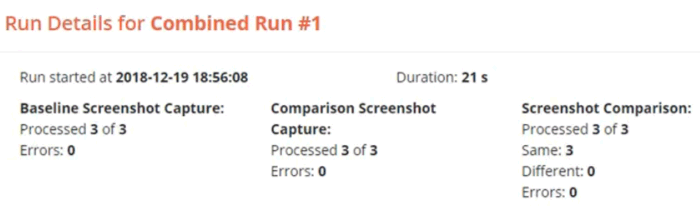
Since I need the screenshot captures to be retaken for both the Baseline and Comparison Captures, and then re-compared, I'll check all three boxes.
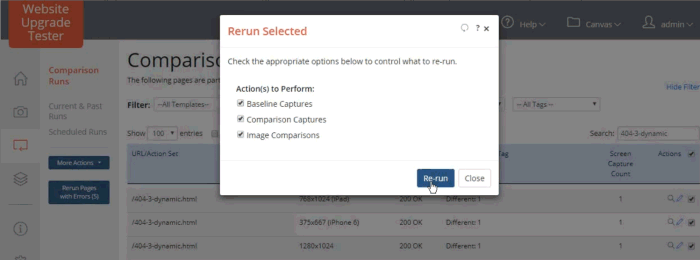
Ok, this will take a few seconds as it re-runs the page three times, once for each different screen size.
Ok, it's done. You can see in the Screenshot Comparison column that there are now No differences. All three screen size captures are now the same.
Since we are filtering on differences, they no longer appear in the listing. Let's clear the filter so we can see them.
There they are. And if we look at the captures, we can see that the Yellow border was drawn around the entire video element.
That's pretty cool. I've successfully mitigated out the dynamic content.
There is one more thing that I want to show you about Page Actions.
Not only can you create your own Page Action that reacts to parameters to mitigate dynamic content, but you can also detect certain things about your page as part of processing it, and use that information to tag, exclude or mark a page as being from a specific template.
Let me give you an example. Say that your site has a subset of content that is restricted to members and that they must log in first before they can see it. But let's say you don't remember all the pages that force the user to log in. You can use the tool to identify these.
Here I've filtered my run and I can see three pages, showing all three screen size captures. I know these pages require login because they are in the members-only section of my site. If I view the live version of one of the pages while not being logged in, I can see it renders a large message in the hero banner, stating 'Sorry Access Denied, This section is only open to Members'. It also shows 'Login' and 'Become a member' buttons below.
If I exit this and look at the screen captures I've done for these pages, I see the same thing. All pages show the same Message.
So in order to detect these pages that require Login. Let's create a Page Action that searches for that message and if it finds it, tags the page as 'Access Denied'.
Make sense? Let's do it.
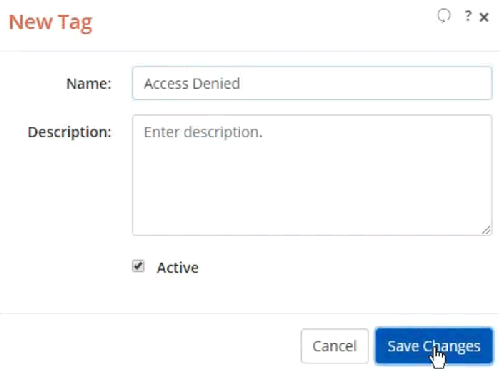
First I'll need to create the 'Access Denied' tag.
That's easy, just click the Site Settings icon, and then the Tags menu.
Here we click the 'New Tag' button and create our tag.
No description is necessary.
There we go. We have our tag.
Next, we'll go back and create a Page Action that does the detection.
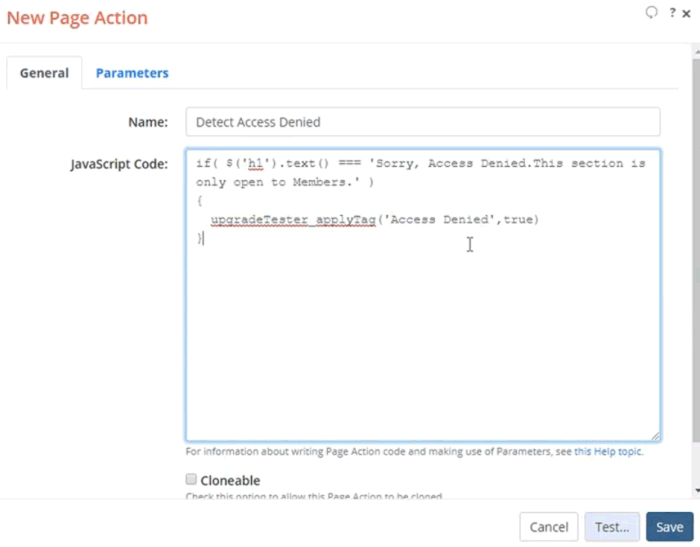
We'll name this Page Action 'Detect Access Denied'.
Since the site always displays the same page when the user is not logged in, I don't need to make my script generic to handle different variations. As such, I'll skip having parameters.
To apply our 'Access Denied' tag to the page I'll write some javascript code.
Here we go.
This code basically hard codes getting the text from the page's H1 tag and if it matches the phrase we expect. 'Sorry Access denied. This section is only open to members', then it will call the out-of-the-box function 'upgradeTester_applyTag' to set the 'Access Denied' tag.
Otherwise, it does nothing.
Currently, there are three out-of-the-box functions. One to set a page's tag, one to set the page's exclude state, and one to associate the page with a named template.
We have made it handy to see the specification for these three functions, along with examples of accessing the parameter values, by clicking this link under the JavaScript Code text area.
Ok great, let's save this Page Action.
Now, just like before, I will need to create an Action Set and apply it to all pages so that the detection code will run.
I'll do that quickly, now.
Here I'll pick the 'Detect Access Denied' Page Action, and give it some time to load.
I'll skip testing this one.
Let's save it and go re-run some pages to see if the detection worked.
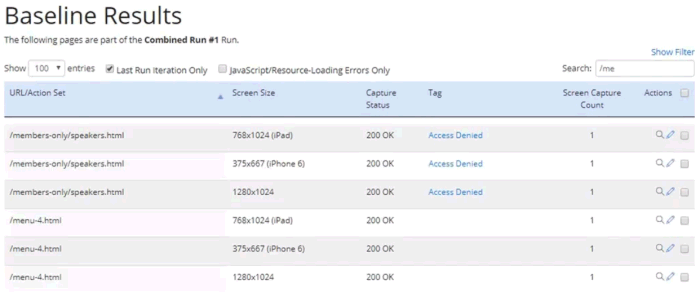
I'll go back to the Baseline Runs page and will click the first number to see all pages in my run.
Next, let's filter down a bit so we don't have to rerun but a few pages to see if it worked.
Ok, I'll choose a couple of these pages. I know the last one listed here requires login and the first one, probably not.
Let's run them now, by choosing the Rerun Selected option.
Ok, it's done.
I can see that it worked. This members-only page and each of its screen size captures are correctly tagged as 'Access Denied'. And the other page is also correctly not tagged.
I hope this example makes sense. This is a technique that you can use when you perform your initial Combined Run for discovering dynamic content.
That's it for this video. I hope you learned how to create and use javascript based Page Actions to mitigate certain types of dynamic content and how to tag, exclude or associate a page with a template.
Be sure to watch our other instructional videos on Website Upgrade Tester.com
---
WebsiteUpgradeTester.com is the only cloud-based, automated visual testing tool designed to help you efficiently and affordably test your website upgrade. Whether it's a major version upgrade, service pack or security patch, you can quickly test your entire site, no matter how large, to uncover any lurking issues due to the upgrade.
Don't waste time manually testing your next Website upgrade. Visit WebsiteUpgradeTester.com and sign up for a free trial.
For more detailed information about best practices on upgrading your website and improving your website maintenance processes, we recommend reading The Ultimate Guide to Upgrading and Patching Your Website.
Featured Blog Posts

The Ultimate Guide to Upgrading and Patching Your Website
In this Ultimate Guide to Upgrading and Patching Your Website, we’ll walk you through all of the terms, concepts, ideas, and best practices around upgrading a medium to large scale website. We’ll impart our experiences of helping customers perform and test their website upgrades over the past 20 years, so that you can upgrade faster, more efficiently, more often and with better results. Read More


CASE STUDY: How Global Manufacturer ESAB Saved Time, $ and Headaches with their Website Upgrade
ESAB leveraged a new cloud-based visual testing tool designed specifically for website upgrades to automate and streamline their testing efforts. Using the tool saved an estimated three weeks of manual testing time, increased accuracy significantly, and gave the team peace of mind that there were no lurking surprises. Read More